Structured cabling installation is the organized, standards-based process of designing, routing, terminating, testing, and certifying the telecommunications wiring that supports voice, data, video, and security systems inside a commercial building. A well-planned installation lasts 15 to 25 years, supports multiple technology refreshes without rewiring, and delivers predictable performance from day one.
This guide covers the full structured cabling installation lifecycle for commercial buildings: the six phases of a professional installation, the six subsystems defined by TIA/EIA-568, cable type selection, cost ranges, timelines, testing and certification, code compliance, and the common mistakes that cause rework and failed inspections. Whether you're planning a new office build-out, a tenant improvement, a data center retrofit, or a multi-building campus deployment, this is the reference to bookmark before your next project.
What Is Structured Cabling Installation?
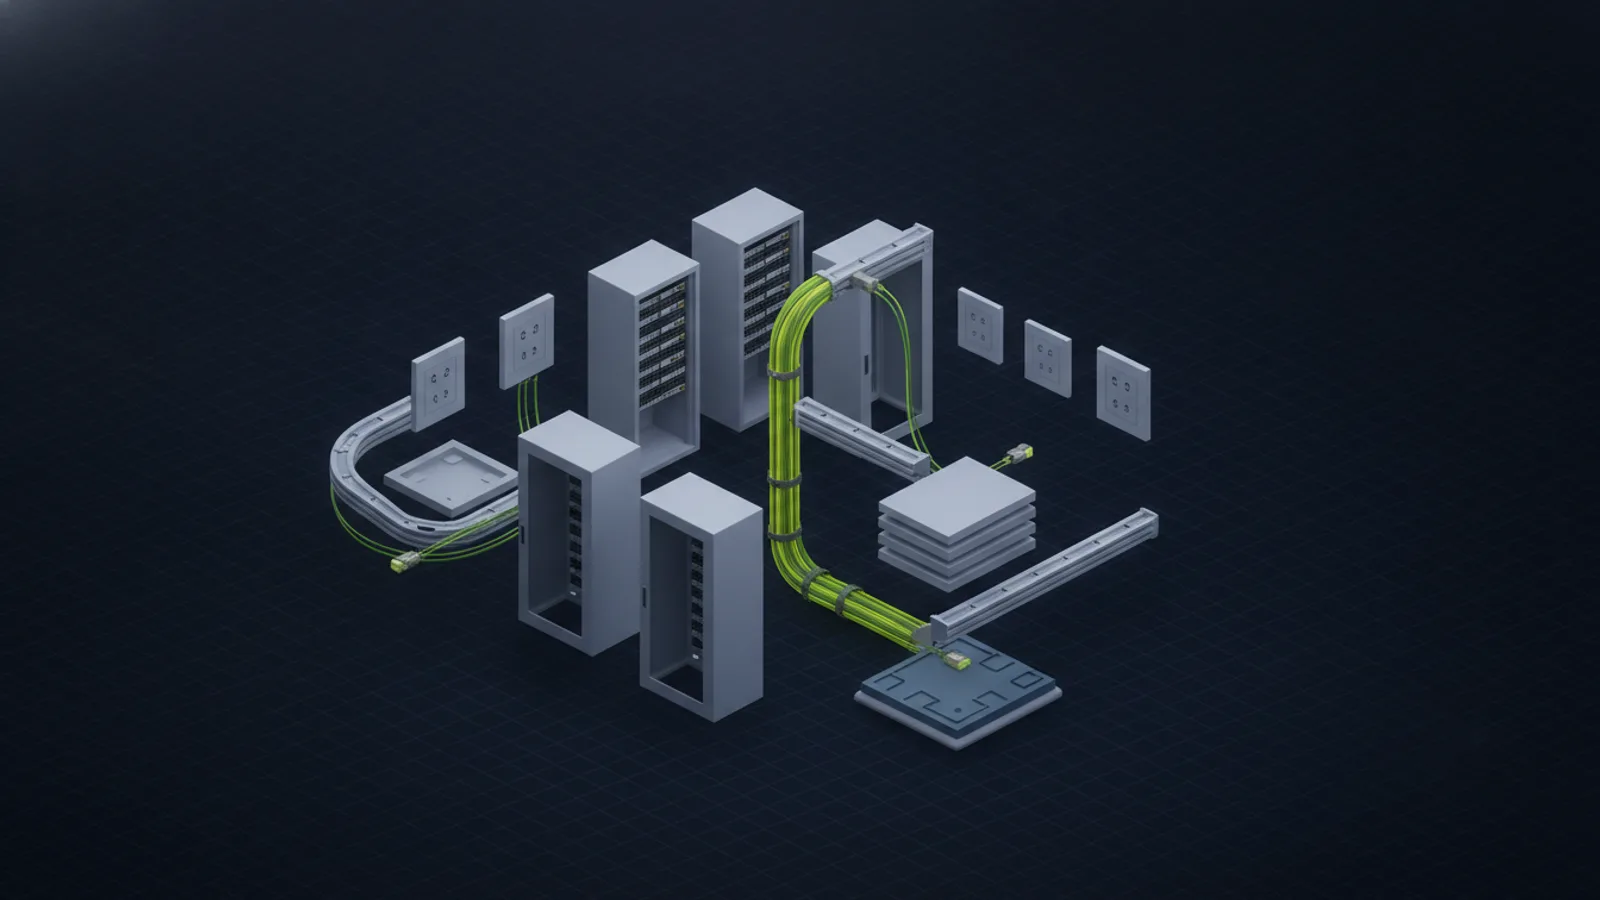
Structured cabling installation is the process of building a standardized telecommunications cabling infrastructure following the ANSI/TIA-568 family of standards. Rather than running cables point-to-point from device to device, a structured cabling installation uses a hierarchical architecture of clearly defined subsystems — entrance facilities, equipment rooms, backbone cabling, horizontal cabling, telecommunications rooms, and work area outlets — that organize and standardize every connection.
The result is a cabling plant that is easier to manage, faster to troubleshoot, cheaper to expand, and capable of supporting technology generations (1 Gigabit → 10 Gigabit → PoE++ → Wi-Fi 7) without pulling new cable. Professional structured cabling installation from a licensed contractor also produces documentation (as-built drawings, Fluke certification reports, cable schedules) that pays dividends for the life of the building.
Key takeaway: A structured cabling installation is not just "running wires." It is an engineered system with six subsystems, six installation phases, strict standards compliance, and documented performance testing. Getting it right the first time is orders of magnitude cheaper than fixing it later.
The 6-Phase Structured Cabling Installation Process
Every professional structured cabling installation follows the same six phases, scaled to project size. A small office may compress phases 3 and 4 into a few days; a multi-building campus may spend weeks on each phase. The phases are non-negotiable — skipping any one of them is how rework, failed inspections, and blown budgets happen.
Phase 1: Discovery and Site Survey
The installation contractor walks the building with the client, IT team, and general contractor (if applicable). The goal is to document every drop location, cable pathway, obstacle, firestop penetration, and code-compliance factor before design begins. A thorough site survey captures:
- Drop count and locations — exact coordinates for every work area outlet, WAP, camera, access point, and device
- Pathway options — cable tray, J-hook, conduit, or innerduct routes from MDF/IDF to each drop
- Ceiling and wall construction — open tile, hard-lid, concrete block, historic structures each change labor significantly
- Fire code considerations — plenum-rated vs riser-rated cable, firestop penetration requirements
- Existing infrastructure — what MDF/IDF equipment, racks, power, and cooling already exist
- Future growth — anticipated drops over 5-10 years so pathway capacity is sized correctly
A proper site survey takes 2-4 hours for a typical office and results in a marked-up floor plan plus written scope notes. It is the single most important phase — every other phase depends on the accuracy of the data collected here.
Phase 2: Design and Engineering
BICSI-trained designers turn the site survey data into a buildable plan. Deliverables from the design phase include:
- AutoCAD floor plans showing drop locations, pathways, MDF/IDF rooms
- Rack elevations for each telecommunications room with patch panels, switches, cable management, and UPS placement
- Cable schedule listing every run by cable ID, drop location, patch panel port, and cable length
- Bill of materials for cable, connectors, pathways, racks, and support hardware
- Compliance check against TIA/EIA-568 cabling standards, ANSI/TIA-569 pathways and spaces, NFPA 70 (NEC), and local building code
For new construction projects, the cabling design coordinates with the general contractor's rough-in schedule. For retrofits, it minimizes occupant disruption and protects existing infrastructure.
Phase 3: Pathway and Rough-In
Pathway installation prepares the physical routes that cables will follow. In new construction this happens during the construction rough-in phase, before drywall and ceiling tiles. In retrofits, the contractor works around existing conditions, often after hours or on weekends. Pathway work includes:
- Cable tray installation in MDF, IDF, and between distribution points
- J-hook or basket support above ceilings at required intervals (typically every 5 feet maximum)
- Conduit and innerduct for in-wall runs, outdoor runs, or where code requires enclosed pathways
- Firestop penetrations through fire-rated walls and floor slabs using UL-listed firestop systems
- Equipment racks and cable management installation in MDF and IDF rooms
Pathway quality determines future flexibility. Undersized pathways mean the cabling plant hits capacity faster; overfilled pathways violate code and make adds/moves impossible. A good rule: design pathways to 40-50% initial fill so there's room to add over the building's lifecycle.
Phase 4: Cable Pulling
Licensed technicians pull cables through the prepared pathways. Quality-controlled cable pulling observes strict limits:
- Bend radius — Cat6A minimum 4x cable diameter; fiber minimum 10x cable diameter. Tighter bends permanently damage performance.
- Pull tension — maximum 25 lbs for Cat6/6A copper; fiber varies by construction (never pull more than the cable jacket can tolerate)
- Separation from EMI sources — minimum 12 inches from fluorescent lighting and motors, further from power cables
- Cable type compliance — plenum-rated (CMP) in air-handling spaces, riser-rated (CMR) in vertical shafts, low-smoke zero-halogen (LSZH) where required
Cable pulling is fast — a two-tech crew can often pull 30-50 drops per day in an open-ceiling office — but every shortcut during pulling shows up as a failed Fluke certification test later. A careful pull is always faster than a fast pull plus rework.
Phase 5: Termination and Testing
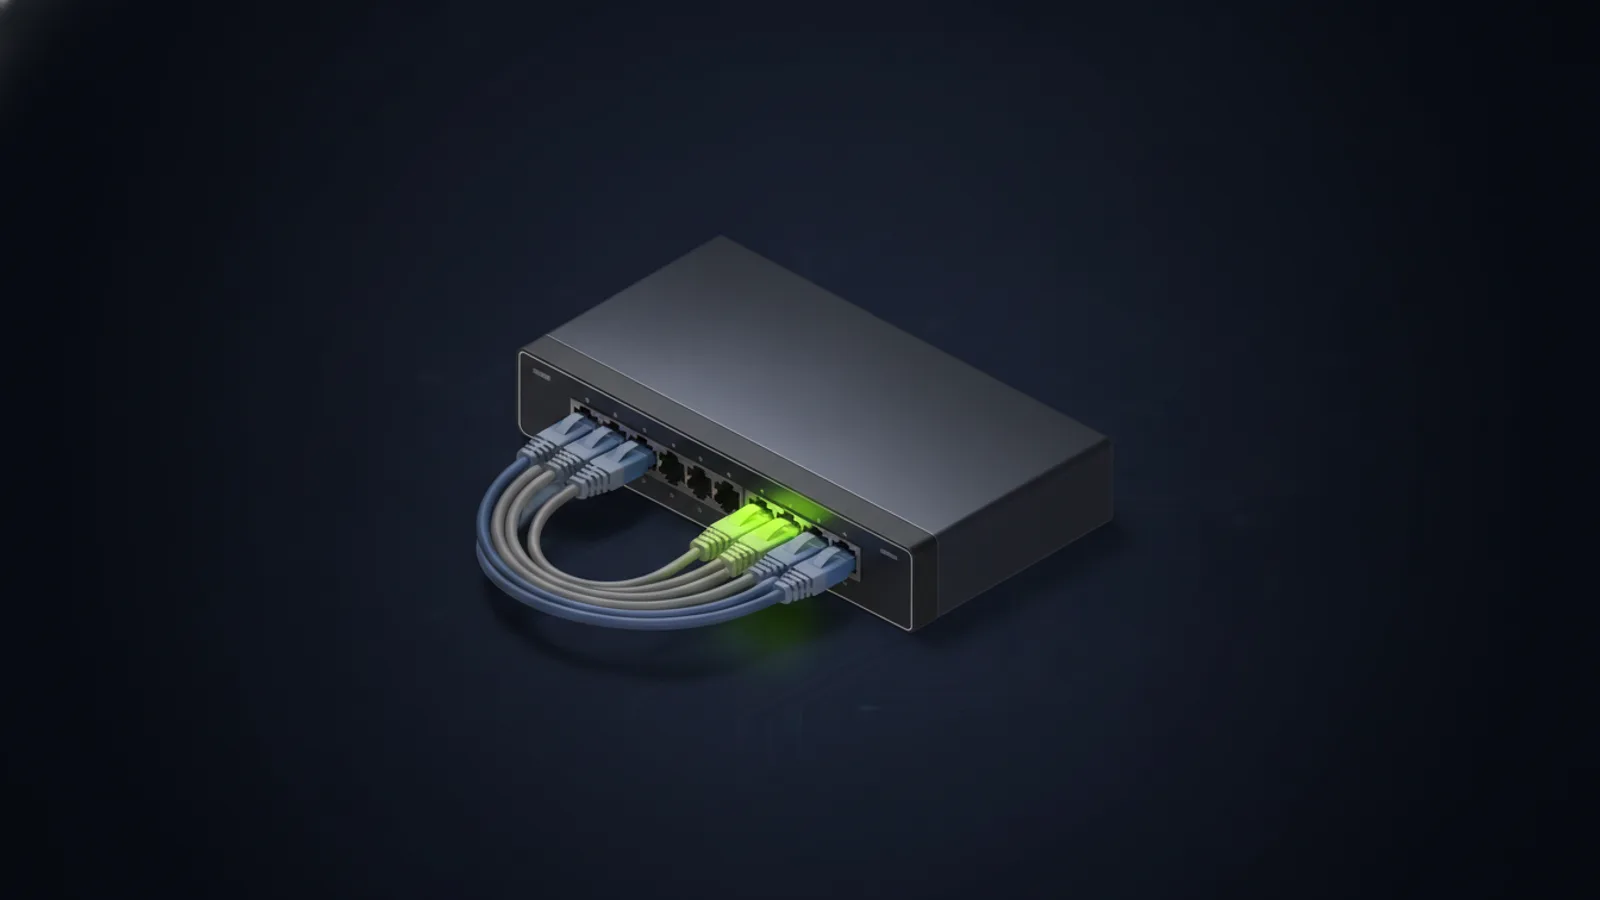
Each cable is terminated at both ends: at the patch panel in the MDF or IDF, and at the work area outlet. For Category cabling (Cat5e, Cat6, Cat6A), T568B wiring is the current standard. Connectors are seated, dressed, and organized with cable management. Fiber optic terminations use LC (most common) or SC connectors, polished to meet insertion loss and return loss budgets.
Every horizontal copper run is then tested with a Fluke DSX CableAnalyzer or equivalent Level V field tester. A compliant Cat6A permanent link or channel test covers:
- Wiremap (verifies correct pin-to-pin continuity)
- Length (within the 90-meter horizontal cabling limit)
- Insertion loss (signal attenuation)
- Return loss (signal reflection)
- Near-end crosstalk (NEXT) and power sum NEXT (PS-NEXT)
- Alien crosstalk (ACR-F for Cat6A at 500 MHz)
- Delay skew (for 10 Gigabit Ethernet)
Fiber runs are tested with an OTDR (optical time-domain reflectometer) for end-to-end length, splice/connector loss, and total link loss. Every certified cable generates a test report that becomes part of the closeout documentation.
Phase 6: Closeout and Documentation
The final phase delivers the documentation that makes the installation usable, maintainable, and warrantable for the next 25 years. Complete closeout documentation includes:
- As-built CAD drawings showing final pathway routes and drop locations (often different from design due to field conditions)
- Fluke certification reports for every cable, PDF-exported per-cable with full test data
- Patch panel schedule listing every port, cable ID, drop location, and termination date
- Labeled rack photo book showing the final state of each MDF/IDF
- Manufacturer warranty registration — 25-year warranty requires registering the installation with the cable/connectivity manufacturer
- Punch list sign-off from the client, IT team, and general contractor
A project without documentation is a project that will be half-rebuilt the first time anyone needs to make a change. Good documentation is not optional.
The 6 Subsystems of a Structured Cabling System
ANSI/TIA-568 defines six subsystems that make up every structured cabling installation. Understanding them helps you evaluate contractor proposals and ensure nothing is missed.
1. Entrance Facility (EF)
The point where outside plant (OSP) cabling from the service provider enters the building. Includes the demarcation point, protection apparatus (lightning and surge suppression for outdoor cable), and any grounding. In most commercial buildings, the EF is a small enclosure near where carrier fiber or copper enters the property.
2. Equipment Room (ER)
A larger, environmentally controlled space that houses shared equipment serving the entire building — core switches, routers, servers, PBX, UPS, and head-end distribution. The ER is typically also the main distribution frame (MDF). Requires dedicated power, HVAC, and physical security.
3. Backbone Cabling
The "trunk lines" that connect the MDF to each IDF, and that interconnect buildings in a campus setting. Almost always fiber optic for distance and bandwidth — single-mode (OS2) for long campus runs, multi-mode (OM3/OM4/OM5) for shorter in-building backbones. Copper backbone is rare today but exists in some voice applications.
4. Telecommunications Room (TR)
A secondary distribution point — usually one per floor or per 10,000 square feet of serviceable area. Also called an IDF (intermediate distribution frame). Houses access-layer switches, patch panels, and cross-connect hardware for horizontal cabling runs to that area's work spaces.
5. Horizontal Cabling
Runs from the TR/IDF to each work area outlet, with a maximum channel length of 100 meters per TIA/EIA-568 (90 meters of solid cable plus up to 10 meters of patch cords). Almost always Cat6 or Cat6A copper in modern installations. Each horizontal run terminates at one patch panel port in the IDF and one work area outlet.
6. Work Area (WA)
The final connection point at the user's desk, conference room, or device location. Includes the wall plate or surface mount box, RJ45 jack, and the patch cord between the jack and the end-user equipment. Modern WAs typically provide 2-4 data ports plus any voice/video connections required.
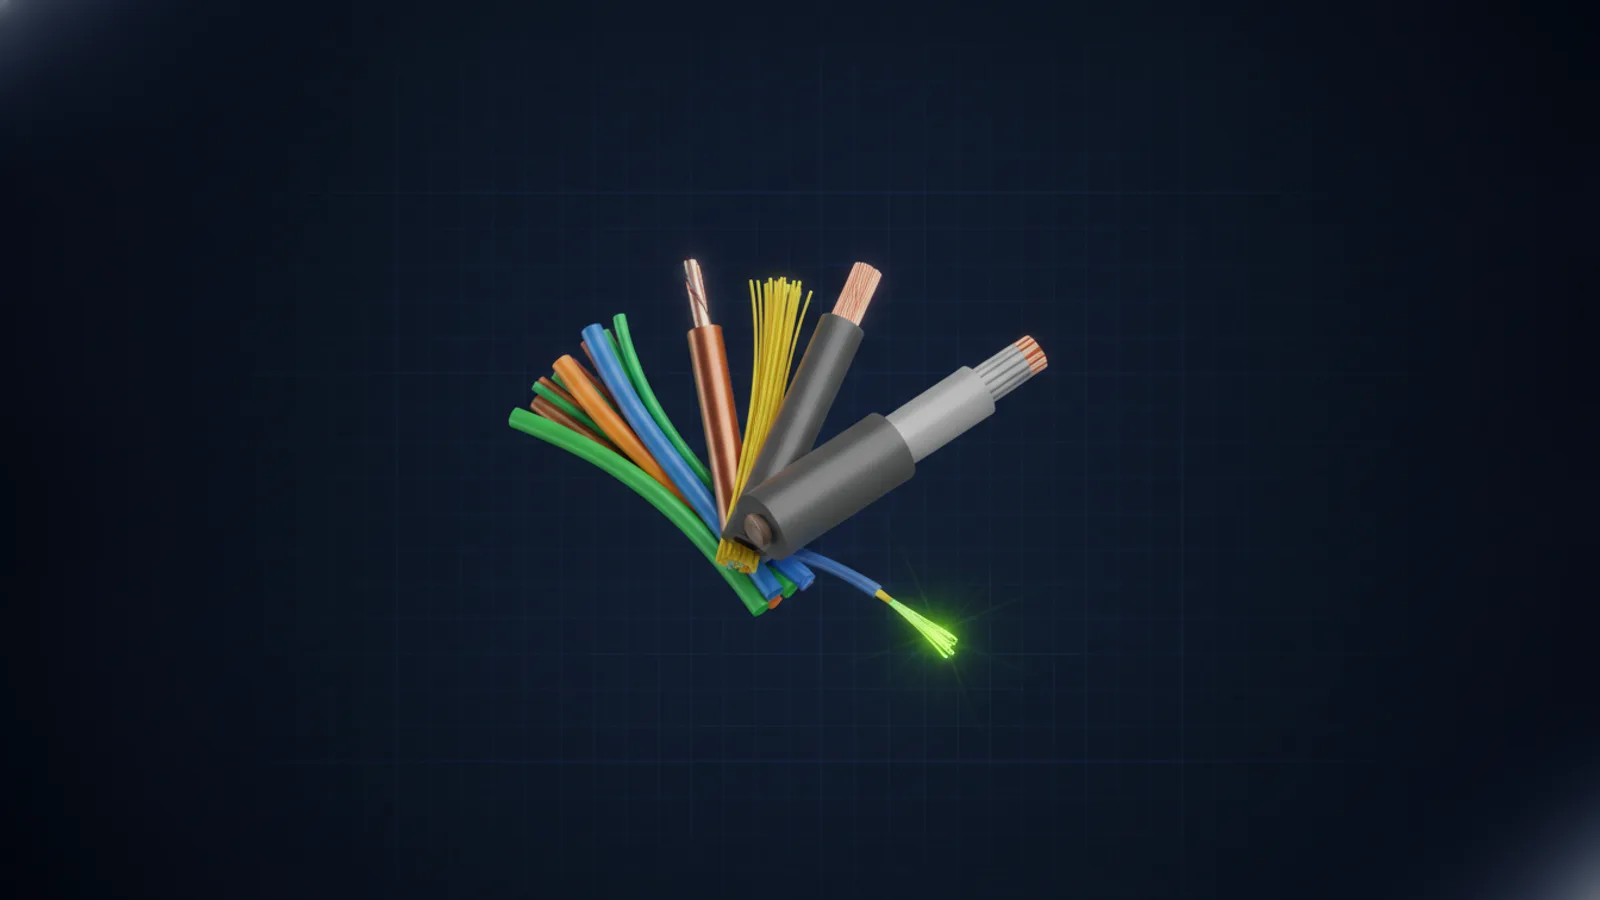
Cable Types Used in Structured Cabling Installation
Cable category selection is a 10-20 year decision. Choosing too thin a category saves upfront cost but forces recabling when bandwidth demands grow. Choosing too heavy wastes money. Here's how the common options compare.
| Cable Type | Max Speed | Max Distance | Typical Use Case | Expected Lifespan |
|---|---|---|---|---|
| Cat5e | 1 Gbps | 100 m | Legacy installations, low-bandwidth workstations, VoIP phones only | ~10 years |
| Cat6 | 1 Gbps (100m) / 10 Gbps (55m) | 100 m | Standard office workstations where 10 Gigabit is not required | ~15 years |
| Cat6A | 10 Gbps | 100 m | Recommended default for new installations — offices, WAPs, PoE++ devices | ~25 years |
| Cat8 | 25/40 Gbps | 30 m | Data center top-of-rack server connections only (distance-limited) | ~25 years |
| Multi-Mode Fiber (OM4) | 100 Gbps | 150 m (100G) | Building backbone, data center switch-to-switch, short campus | ~30 years |
| Single-Mode Fiber (OS2) | 400+ Gbps | 10+ km | Campus backbone, long-haul, WAN uplinks, carrier services | ~30+ years |
For a typical new commercial office installation, the modern default is Cat6A horizontal cabling (for 10 Gigabit support and better PoE++ thermal performance) combined with OM4 multi-mode fiber backbone between the MDF and each IDF. This combination supports at minimum 10 Gigabit to every device and 100 Gigabit on the backbone, with enough headroom for the next decade of bandwidth growth.
Structured Cabling Installation Cost
Commercial structured cabling installation pricing is typically quoted per drop, with drop prices varying by cable category, building conditions, and project scope.
| Drop Type | Typical Price per Drop | What's Included |
|---|---|---|
| Cat6 drop (open ceiling) | $150 - $250 | Cable, jack, patch panel termination, test, label |
| Cat6A drop (open ceiling) | $200 - $350 | Cable, jack, patch panel termination, Fluke certification, label |
| Cat6A drop (hard-lid ceiling) | $250 - $450 | Adds labor for drywall/ceiling access, fishing runs |
| Cat6A drop in conduit | $300 - $550 | Adds conduit, fittings, and labor for enclosed pathway |
| Fiber optic drop | $400 - $800 | Pre-term or field-term fiber, OTDR test, dedicated hardware |
| MDF/IDF rack build-out | $1,500 - $6,000 per rack | Rack, patch panels, cable management, grounding, labeling |
Factors that move pricing up or down:
- Drop count — larger projects benefit from mobilization efficiency; per-drop pricing decreases at 50+ drops
- Ceiling and wall type — drop tile ceilings are fastest; hard-lid, concrete, or historic construction add significant labor
- Building height and access — multi-floor buildings need risers; secure facilities may require escort time
- After-hours premium — occupied healthcare, 24/7 operations, and trading floors typically pay 1.25-1.5x standard rates
- Firestop and code requirements — plenum-rated cable costs 30-50% more; firestop penetrations add per-penetration cost
- Certification level — permanent link certification (baseline) vs channel certification (end-to-end including patch cords)
A Tucson or Phoenix office of 75 Cat6A drops in an open-tile ceiling with a single IDF build-out typically lands between $18,000 and $30,000 including Fluke certification and as-built documentation. For more context on what drives cost, see our complete guide to structured cabling services.
How Long Does Structured Cabling Installation Take?
Timeline depends on drop count, building complexity, and schedule constraints. Rough ranges for commercial projects:
| Project Size | Drop Count | Typical Duration | Notes |
|---|---|---|---|
| Small office | 10 - 30 drops | 2 - 4 days | Single IDF, open ceiling, during business hours |
| Mid-size office | 30 - 100 drops | 1 - 2 weeks | Typical tenant improvement for growing business |
| Large office / floor | 100 - 300 drops | 2 - 4 weeks | Multiple IDFs, possibly multi-floor |
| Multi-building campus | 300 - 1,000+ drops | 4 - 12 weeks | Phased deployment, OSP fiber, multiple trades coordination |
| Data center cabling | Varies | 1 - 6 weeks per row | Pre-terminated MTP/MPO trunks, high-density patching |
New construction projects have a longer overall timeline (matching the construction schedule) but less compressed work — the cabling contractor mobilizes during rough-in, leaves, and returns for termination after drywall and ceiling finish. Tenant improvements and retrofits pack the full six phases into a tighter window.
TIA/EIA-568 Standards and Code Compliance
Professional structured cabling installation is governed by multiple overlapping standards and codes:
- ANSI/TIA-568 — the foundational commercial building telecommunications cabling standard. Defines cable categories, performance tiers, test methods, and topology.
- ANSI/TIA-569 — pathways and spaces. Defines telecommunications room sizing, pathway types, fill ratios, and bend radius requirements.
- ANSI/TIA-606 — administration and labeling. Defines the naming conventions and records required for long-term manageability.
- ANSI/TIA-607 — grounding and bonding. Critical for shielded cabling and for data center installations.
- NFPA 70 (National Electrical Code) — Article 800 covers communications circuits, cable listings (CMP, CMR, CM), and firestopping.
- Local building code — additional city/county requirements for permitting, inspection, and accessibility.
In Arizona, commercial structured cabling installations exceeding $1,000 in value require a licensed contractor registered with the Arizona Registrar of Contractors. Unió Digital holds ROC 327245 and ROC 333580 and installs to full TIA/EIA-568 compliance with LanTEK IV certification on every cable.
Common Structured Cabling Installation Mistakes to Avoid
Twenty years of installs surfaces the same avoidable mistakes repeatedly. The big ones:
- Skipping the site survey. Pricing from a blueprint is guesswork; the real conditions of the building always reveal surprises. A $500 site survey prevents $5,000 change orders.
- Choosing Cat6 when Cat6A is right. The marginal cost difference at install is 15-25%; the recabling cost when 10 Gigabit becomes necessary is 100%+. For installations expected to last 10+ years, Cat6A is almost always the right choice.
- Undersizing pathways. Filling cable tray or J-hook to 90% at installation means no growth capacity. Design to 40-50% initial fill.
- Mixing voice and data cables without separation. Modern digital voice shares cable with data, but analog voice, paging, and high-voltage signals must be separated to prevent crosstalk.
- Ignoring bend radius and pull tension. The cable may look fine; Fluke will reveal damage that invisibly impacts performance.
- No labeling scheme. Cables installed without consistent labels become untraceable after the first move/add/change. ANSI/TIA-606 labeling is not optional.
- Skipping Fluke certification. "Pinging the other end" is not testing. Without certification reports, the 25-year manufacturer warranty does not apply.
- No as-built documentation. Designs always change during install. Without updated as-builts, every future project starts from scratch.
Who Should Install Your Structured Cabling?
Commercial structured cabling installation requires a licensed contractor — in Arizona, a low voltage or electrical contractor registered with the Arizona Registrar of Contractors (ROC). Before signing with any contractor, verify:
- State contractor license in good standing (lookup at ROC.az.gov for Arizona)
- General liability insurance of at least $1M (preferably $2M for commercial work)
- Workers' compensation coverage for all on-site technicians
- BICSI certifications (RCDD, Installer, Technician) on the engineering and lead installation team
- Fluke DSX CableAnalyzer or equivalent Level V field tester on site
- Manufacturer certifications required for 25-year warranties (Panduit Certified Installer, CommScope Certified, Leviton Certified, Belden Certified)
- Commercial project portfolio at similar scale to your project
- Detailed written scope and fixed-price proposal — hourly time-and-materials invites runaway cost
Unió Digital is a licensed Arizona structured cabling contractor (ROC 327245, ROC 333580, Alarm License 25254-0) serving commercial businesses statewide. For a free site survey and fixed-price quote, request a structured cabling quote or explore our structured cabling solutions.
Frequently Asked Questions
How much does structured cabling installation cost per drop?
Commercial structured cabling installation costs $150-$250 per drop for Cat6 in open-ceiling offices, $200-$350 per drop for Cat6A, and $250-$450 per drop for hard-lid ceilings or retrofit conditions. Fiber optic drops run $400-$800. Pricing includes cable, jack, patch panel termination, Fluke certification, and labeling.
How long does a typical structured cabling installation take?
A small office with 10-30 drops takes 2-4 days. A mid-size office with 30-100 drops takes 1-2 weeks. Large offices with 100-300 drops span 2-4 weeks. Multi-building campus projects run 4-12 weeks. New construction timelines extend over the full construction schedule with work phased around rough-in and finish.
What's the difference between Cat6 and Cat6A for structured cabling installation?
Cat6 supports 1 Gigabit Ethernet to 100 meters and 10 Gigabit to only 55 meters. Cat6A supports full 10 Gigabit Ethernet to 100 meters with better alien crosstalk performance and improved PoE++ thermal handling. For new installations expected to last 10+ years, Cat6A is the recommended default — the 15-25% cost increase is small insurance against future recabling.
Does structured cabling installation require a licensed contractor in Arizona?
Yes. In Arizona, structured cabling work valued over $1,000 requires a licensed contractor registered with the Arizona Registrar of Contractors. The applicable license classes are L-67 (low voltage) or CR-67 specialty licenses. Unió Digital holds ROC 327245 and ROC 333580 for commercial structured cabling work statewide.
What standards govern structured cabling installation?
The primary standard is ANSI/TIA-568 for cable performance and testing. Related standards include ANSI/TIA-569 (pathways and spaces), ANSI/TIA-606 (labeling and administration), ANSI/TIA-607 (grounding), and NFPA 70 Article 800 (cable listings and firestopping). Local building codes add permitting and inspection requirements.
How long does a structured cabling installation last?
A properly designed and installed Cat6A structured cabling system typically delivers 20-25 years of useful service. Fiber optic backbones last 25-30+ years. The cabling outlives 2-3 generations of active network equipment (switches, WAPs, phones), which is the whole point — you replace the electronics every 7-10 years but never re-pull cable.
What is Fluke certification and do I need it?
Fluke certification is the industry-standard performance test for installed cabling. A Fluke DSX CableAnalyzer measures wiremap, insertion loss, return loss, near-end crosstalk, alien crosstalk, and delay skew, comparing results against TIA-568 Category 6 or 6A performance specifications. Without Fluke certification reports, you cannot register the 25-year manufacturer warranty and you have no record of actual as-installed performance. Insist on Fluke certification on every cable.
Planning a Structured Cabling Installation in Arizona?
Unió Digital is a licensed Arizona structured cabling contractor serving commercial businesses statewide. Every drop is LanTEK IV-certified. Every project is fixed-price.
Request a Free Site Survey